Showing posts with label kitchen. Show all posts

Friday, November 18, 2011

Our newest addition…

to the kitchen that is.  Sheesh, it’s been a long time since I’ve posted.  I had to write a catchy title to get your attention! J/K  No big news here.  Just wanted to pop in and share a little something new we added to the kitchen.  I took these pictures along time ago and had plans to post them a long time ago, but photography got the best of me.  I should have warned you that I would be disappearing for a bit.  I had four photo shoots over the last two weekends.  You can check two of them out here.  I’m working on the other two and hopefully will share them soon. 

On to my kitchen.  I was inspired when I went to Arizona in October.  My brother and sil moved into a new house a little while ago and have been working hard to fix it up.  There are so many things I love about it, including the floor plan. But when I got home from my trip, there was one thing I could not get out of my mind.   A dinner bell.  Now, why did that not ever cross my mind?  She randomly found it at TJ Maxx for $15.00 one day.  I came home determined to find one too.  I knew I most likely wouldn’t find one at our TJ’s or Marshall’s since that is such a fluke thing to find.  I found one online.   Here is the one I got. 

Bell cr

I thought it would be such a fun and memorable item to have in my kitchen.  Useful too, to say the least.  This baby is LOOOOUUUDD!!  I hung it up high.  While I want to use it to round up the kiddos, I don’t want them walking by ringing it all the time…because you know they would.  I also hung it by the back door in my kitchen.  That way it can be heard inside and outside.  I just open the back door and they come running.  Much better than me YELLING to get their attention.  They think it’s cool. 

I had Drew be my bell demonstrator one day.  He thought HE was cool.

Lightroom Edits11

It has proved to be a great purchase for my family. 

On a side note, I think it’s rather ironic that I am blogging about my sil while we are in the car on a road trip to stay with her and the rest of my family for Thanksgiving.  We are starting our Thanksgiving break early this year and we are SOOOOO excited.  Between vacation, photography and holiday to-do's I might be hit and miss here on the blog for awhile, but I have a lot to share and I am going to try to take time to do just that. 

Have a happy and safe Thanksgiving if you don’t hear from me before then! :)

Tuesday, October 11, 2011

Halloween/Fall Decor. {Part 3}

Ok.  I am moving forward with my Halloween theme this week.  Lots to share!  However, we did start celebrating Ady’s birthday yesterday.  It is her birthday WEEK.  It is a lot more fun to have a birthday week than a birthday.  More to come about Ady’s birthday soon.

For now, here is my kitchen halloween table scape. 

Table_0002

Candy corns and pumpkins.  It doesn’t get much better (or easier) than that!

Tab;e_0005

 Skeletons, crows and spiders too.  With more spanish moss.  By the way…I purchased my spanish moss at Dollar Tree.  I used 2 and a half bags and I have it everywhere.  It goes pretty far. 

Table_0011

Untitled-2

I was lazy this year and didn’t do a table runner.  I have some black and white fabric I was going to do something with, but when it came down to it…I just didn’t feel like it!

Table_0015

Table_0026

Pumpkins are my favorite.  I can’t get enough of them.  Layering them in bowls on my table helped to add different heights and texture.  I painted the white pumpkin.  I love white pumpkins, but didn’t want to pay the price.  I did last year and said I was NOT going to do that this year.  I spray painted a lot of pumpkins this year.  More to come about that soon.  :)Untitled-1

Since I shared about our kitchen in this post, here are two small treats to go along with it.  We will be making these sometime this month.   

Monster Hot Chocolate.  How easy is this???   Whenever it really decides to cool down a bit, my kids will be getting their first mug of hot chocolate for they year monster style.

264849249_vk0mefnf_c 

Source 

 Cute pretzel ghosts.

124357253_7WSW5PCY_c

Source

We dip pretzels in white chocolate every year.   Usually it’s the pretzel twists.  This year we will try pretzel sticks instead and make ghosts.

Next up…my fireplace mantles.

Friday, September 30, 2011

Caramel Apples

Last Thursday I was in charge of a caramel apple demonstration at church for Relief Society.  I have never made a caramel apple before in my life!  Shocking, right?  I’m sure a bazillion of you have made caramel apples before, but I have not.  I have eaten plenty, but never made any.  This wasn’t just about teaching the women how to dip apples in caramel, it was a gourmet caramel class.  When I was asked to take this assignment, I made sure they all knew that I had never done this before.  They told me it was easy.  OK. 

So now I am here to tell you (those of you that were like me and had never done this before) that it is EASY and so fun!  For years during the fall I have thought about doing caramel apples, but never have for lots of reasons. 

I didn’t know how.

I thought it was hard.

I thought I had to have a perfect caramel recipe.

It seemed way too messy.

It is not hard at all!  It may be a little bit messy, but nothing bad at all.  That should say a lot coming from someone who seriously hates messes.  After doing some research about the process of gourmet caramel apples I was ready to go.  I had a practice day at home first. 

I learned a lot from this site.  My pictures are hit and miss, but I will show you what I learned and how I did it. 

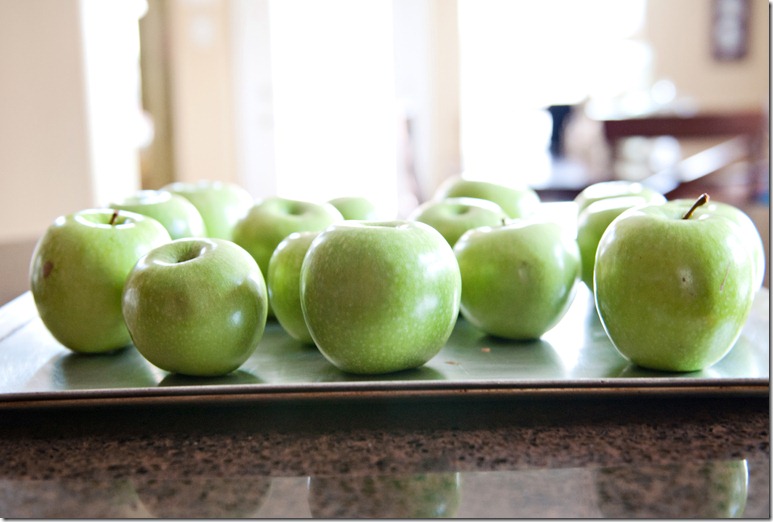
1.  You first start with 8-10 small to medium sized apples.  Granny Smith or Fuji are the best.  I prefer Granny Smith.  Smaller apples are better.  They are easier to work with and it makes the caramel go further. 

2.  You have to wash them very well to get the wax off store bought apples.  This helps the caramel stick better to the apple.  There are a couple of ways you can do this.  Dip them for a second in boiling water.  Lightly sand them, or give them a baking soda bath, which is what I did.  I filled up my sink with HOT water and poured some baking soda in.   Then I scrubbed them with the rough side of my kitchen sponge and rinsed them in hot water. 

3.  I dried them with paper towels and then set them out to finish drying.  They have to be completely dry.  Which is why this should be your first step.  They can dry while you prepare everything else. 
Apples_0017

4.  Next, I got all of my supplies out and toppings prepared. 

Apples_0021

Supplies: apples, caramel (not pictured) sticks, toppings and wax paper.  You can buy the sticks at any craft store, possibly any grocery store.  I purchased mine at Walmart while I was there getting everything else. They were in the cake decorating isle.  There are short, medium and long sticks to choose from.  I bought the medium ones.  I will get to the caramel in a minute.

As for the toppings…I went with chopped peanuts, M & M’s, Heath Bar bits (these were all ready in a bag by the chocolate chips) crushed Oreo’s, chopped pecans and miniature marshmallows.  View the same site I mentioned earlier for other topping ideas.

Apples_0027 1

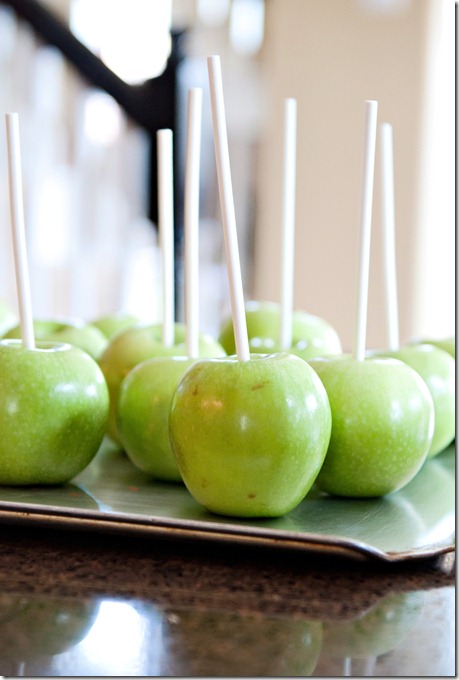
5.  Then it is time to put the sticks in the apples.  You want to remove the apple stem first.  Putting the stick in was a little bit tricky.  Sometimes they were really difficult to push in and the stick would bend, but you can bend it back easily.  The palm of my hand was starting to hurt from pushing the stick so hard.  I got about half way through with the sticks when I realized that it didn’t have to hurt me like that.  Sometimes it takes awhile for things to click!  I used the rubber thingy that I use to open glass jars with to cushion my palm.

  Apples_0033

This helped a lot. 

Apples_0034

I’m sure a kitchen towel would work too.

Here they are.
Apples_0032

The apples are ready, the toppings are prepared so now it is time to do the caramel.

6.  You can melt the caramel in the microwave or on the stove.   There are several different caramel recipes.  Once again, I used this site to figure out which recipe I wanted.  I opted not to go for homemade, but to go for easy.  I bought the packages of Kraft Caramels.

  Apples_0003

Using the Kraft Caramels, you need to individually unwrap 2 24 oz. packages of caramels.  Melt them on the stove at a medium heat with 4 Tbsp of milk.  It says whole milk, but I used 2%.  Just like it says to use a double broiler, but I didn’t.  They worked fine.  If you melt them in the microwave, follow the same instructions only stopping to stir every 30 seconds until melted. 

7. Then it is time to dip the apples in the caramel.  Dip them straight in to get as much apple covered as you can and then turn sideways to get the top edges better. 

Apples_0036

I put the caramel in this bowl to dip, but it would actually be much easier to dip them in the pot you use to melt the caramel on the stove with.  The pot has a handle so you can rotate the caramel better and get better coverage plus you can put it back on the stove to keep warm in between apples.  If you melt in the microwave use a big measuring glass or bowl that has a handle and you will be able to rotate the caramel better also.   When you are done dipping the apple, pull it straight up and let the extra caramel drip off.

8.  As soon as you are done dipping one apple, roll it in your topping right away.  The caramel sets quickly.  

Apples_0038

I learned to have my wax paper on a plate ready to go in the fridge.  You want to allow to set up in the fridge as soon as you are done topping it.  If you top your apple with something heavy or big, like M & M’s or marshmallows and leave it on the counter to set up it will drip to the bottom and not stick.  That was my experience.  So they all went straight into the fridge. 

9.  After each apple was rolled in a topping and chilled in the fridge I drizzled them with milk chocolate or white chocolate.  I melted the chocolate in a bowl in the microwave and then scooped them into their own zip lock bag and snipped a tiny corner off to drizzle with.  This was the finishing touch. 

Aren’t these so fun?

Apples_0044

I was really happy with how they turned out.

Apples_0042 

They were so yummy and delicious too.

Apples_0061

My kids were so excited when they got home from school that day and saw such an unexpected treat.  I had all of my practice apples cut up on a plate ready to go. 

They thought I was pretty awesome that day. 

Some other things I learned was to chop up my M & M’s.  I chopped them with my Pamper Chef Chopper.  The M & M’s whole were too heavy.  Also, read the tip on that site for dipping in chocolate after dipping in caramel.  It sounds yummy!  If you are going to do any of this with kids, I would DEFINITELY have it all prepared before you invite the kids to help.  I am talking caramel done and everything.  I don’t think it would be as enjoyable to have the kids in the kitchen for the whole thing.  It actually sounds like a big fat headache to me! 

I think this would be such a fun thing to do with or with out kids.  I loved my day in the kitchen playing and learning something new.  Having said that, I am going to give this a try with the kiddos this weekend.  It’s time for us to start celebrating the holidays and I think this is a great start.   Hopefully it doesn’t turn into a disaster.  It will be interesting!

Linking up to:

 
Tatortots and Jello Weekend Wrap Up


Thursday, May 5, 2011

Around Here {my kitchen table centerpiece}

Once I added a chandelier above my kitchen table, my current center piece didn’t work anymore.  It wasn’t in proportion.  So of course I had to fix that. :)

My re-do started out with this before and after.

Before and After

The glass jar once held tall twiggy greenery, but when I hung the chandelier the twigs were too tall.  It sort of just evolved into the after.  I love when that happens!  I knew I wanted to put old book pages inside.  I just randomly grabbed a book and started tearing out pages.  I actually did this whole project while talking on the phone.  You can’t see it, I forgot to take a close up, but the edges of the paper are stained green.  That’s just how the pages came, but you could easily ink the edges.  It’s the perfect extra touch that just happened to be a bonus for me.  I noticed it after the fact.  Once I added the book pages I decided it needed more, so I added the twine.  I didn’t glue it or anything.  I just tied the end and beginning of the twine in a knot around the top and then kept wrapping it around until I got to the bottom and then tied it in a knot again to end it.  I thought I was done after this and then walked back into the room and decided I wasn’t. It needed an extra whimsical touch.  Something out of the ordinary, since the chandelier is out of the ordinary.  So I decided to experiment with stamping #’s.  I was a little nervous since I really do love this glass jar and I did not want to ruin it, but I am so glad I took the risk and went for it.  It is one of my favorite things!  Side note:  I did this same technique on a frame in my bedroom and the ink would wipe off the glass with Windex, but this glass is different and will NOT wipe off.  Luckily I didn’t mess up and I absolutely adore it, but if you try this, maybe test it first in an unnoticeable spot if you aren’t sure.  I used a regular black ink pad, nothing special and some # stamps I had from my paper scrapping days. 

At one of my Hobby Lobby runs I found these 3 bottles and had to bring them home with me. 

Bottles - 1 edit

I sanded the two pictures to make them look more vintage.  They looked too new before.  Then I tore some more book pages and stuffed them into the center one and tied some twine around the top. 

I decided I wanted to go with a glass look for my table.  Something light and airy, but it wasn’t finished with the 4 things I had.  Something was missing.  So I pulled out my glass cake stand that had been tucked away in my cupboard. 

Cookies

I didn’t have any homemade treats :(  no time for that, but I ALWAYS have a stash of Oreo’s!

Here was my finished product…for a couple of days.

Kitchen - 1 edit 

I really liked it, but I still felt like something was missing.  Sometimes I have to live with things for a couple of days.  Then I remembered my thrift store .99 bargain. 

Here is another before and after.

Before and After 1 

I wrapped the bottom with burlap and tied twine around it. 

I found this nest printable here.

Tag - edit

I printed it out onto cardstalk.  I decided to make it into a tag and embellish it with glitter.  I was dying to try this new glitter.  I have had it for a couple of months and it was time use it!  

This glitter is another one of  my new favorite things! 

Glitter - CW

German Glass Glitter.  SO much better than the average glitter you get at the store.  It is so easy to use and much better quality.  I love the fact that it will tarnish and look even more vintage. I got it at a boutique while shopping in McKinney, Tx.  I glittered up the edges of the tag and added a bit to the birds.  Once it was dry, I tied it around the topiary with some black vintage ribbon I also purchased at the same boutique for .50 a yard.  And that finished that!

Table - 1 - edit 

So much better, I think!

Table edit

It needed something to break up the glass.  By this time I DID have a homemade treat in my cake stand. :) 

Cake Cookies edit

The recipe is easy and yummy.  Definitely a treat to make when you are in the mood for a treat, but have NO time.  Super fast.  I am so glad a fellow blogger shared this.

And here is the final product.

Kitchen - 2-edit

I am contemplating a table runner.  I love how simple and clean it looks like this and I really don’t like dealing with more than I have to on my kitchen table, but I don’t know.  For now…I am done! What do you think?

P.S.  Did you notice that half of the cookies are gone in this picture compared to the one above it?  My kids loved them!

Related Posts with Thumbnails