
I have been wanting to do a post about the frame I made at Enrichment for weeks now. I am in love with this frame.

It is a sweet reminder that Christ is the center of our family and in all of the things we do.
Before I even made the frame, I knew right where I was going to hang it.

In my kids’ hallway upstairs.
I already had this vinyl quote on the wall with a different frame under it. I just swapped them out. To me, it’s the perfect spot. Right by their bedrooms where they can see it and be reminded of Christ every time they walk up the stairs.
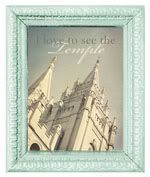
Here is a closer look.

Project Rundown:
The photos are 2 inch squares glued onto 2 inch squared chipboard. The photo of Christ in the center is a 4 x 4 square. I bought the frame at Hobby Lobby with my 40% off coupon. I knew I wanted a square frame. It’s much easier to do this project within a square. A 12 inch square frame would have been ideal, but this 13 x 13 one worked too. I started out by gathering photos. There are 16 squares with photos and 16 squares with scrapbook paper. I am lucky because I have a 2 inch square punch. That made trimming the photos and the paper a cinch. Our Enrichment leader (Tove) had the chipboard squares already trimmed down when we got there. That was nice not to have to cut those. FYI - The chipboard comes in a 12 inch square at Hobby Lobby. I tried my best to coordinate the paper so it went well together and so the colors matched the interior of my home. Once everything was trimmed, I used a glue stick to attach the photos and paper to the chipboard. Then I sanded the edges of each square and rounded the corners with a nail file. Then I inked the edges with an ink pad. I used brown. I learned a new inking technique. * Cut a corner of a sponge off and dip that in the ink pad and then rub it on the edges. It was much easier to get the ink right where I wanted it to be. Thanks Tove! After the squares were sanded and inked it was time to glue them down. When all of the squares were put together it came to a 12 x12. My frame was a tad bigger than a 13 x 13 so I had to figure something out. I ended up flipping the back cover of my frame over (the piece that holds your picture in place). It was a pretty charcoal color so I glued my squares onto that and had a nice edge between the chipboard and the frame. It worked for me. Before I glued them down I played with the layout a little bit until I got it just right. I had the photo squares and scrapbook squares layed out to be every other – the photos aren’t next to each other and the papers aren’t next to each other. It was like putting together a puzzle. Once I was satisfied with the layout I glued it down with Scotch Quick-Dry Adhesive. That stuff is amazing!! You have to be quick and precise when you stick the squares down. Once they are down, they aren’t moving! Then it was time to embellish some of my paper squares. This was a fun part. I attached them with glue dots. Here is a closer look at some of my embellishments.


Flowers , buttons, charms, monogram letters, ribbon, tulle. Pretty much anything goes. The butterflies were fun. It is a punch and then you just bend the wings up so they pop out more. I didn’t embellish every paper square. I think it would be too much. I took the glass out of my frame so it could have more of a 3D affect. I love it!

My head has been swimming with ideas. I have been dreaming of chipboard. Tove had this really cute one done on canvas. I wish I had snapped a picture. The possibilities are endless. One of the girls was going to do a collage with her daughters school picture in the center and then everything that represents her around it. There are so many different themes you can do and ways to display it. It was such a fun creative outlet.
Supplies:
Frame
16 - 2 inch square photos
16 - 2 inch square scraps of paper
1 - 4 x 4 photo for the center
32 - 2 inch squares of chipboard
1 - 4 x 4 inch square chipboard
Embellishments
Nail file of soft sand paper
Ink pad and small sponge
Glue Stick
Glue Dots
Scotch Quick – Dry Adhesive
Let me know if any of you try this technique. I would love to see what you come up with. Thanks Tove for the wonderful Enrichment and inspiring me!


15 comments:
This is amazing!! This is definately going on my project list!
this is SO cool! I love it. I love the pictures that you chose. Now you have me thinking of what I can do!
I'm glad I get to see it all put together! Now that it's over, I guess it was a pretty good project. I won't ever do it again, but I'm sure you will, and I bet it will go so much faster the second time.
LOVE it!!!! Thanks for sharing! I will have to add it to my ever growing list of to-do's!!;)
That is beautiful!!!
I love that!! It turned out awesome!!! I really want one now!! Good job!
Very charming! TFS. My home is totally decorated with ideas I've gotten from blogs. This shall be added to that list.
That is beautiful. Thank you so much for taking the time to write down how you did it.
So super cool! You did a great job!
That is WONDERFUL!! thanks for the inspiration!
I love your crafty project!!! I'm trying to get back into making things again. I've been on a 10 year break.
This is so great! I love it!! I want to make one, it just might be awhile before I get around to it :)
I LOVE this project! I want to make one. Thanks for sharing.
So cute! Absolutely LOVE this!!!
This is so beautiful! I have a wall (kind of a funny angel) and no idea what to do with it...this is perfect! Thanks for the inspiration. I just came across your blog tonight and am ADDICTED!
Post a Comment